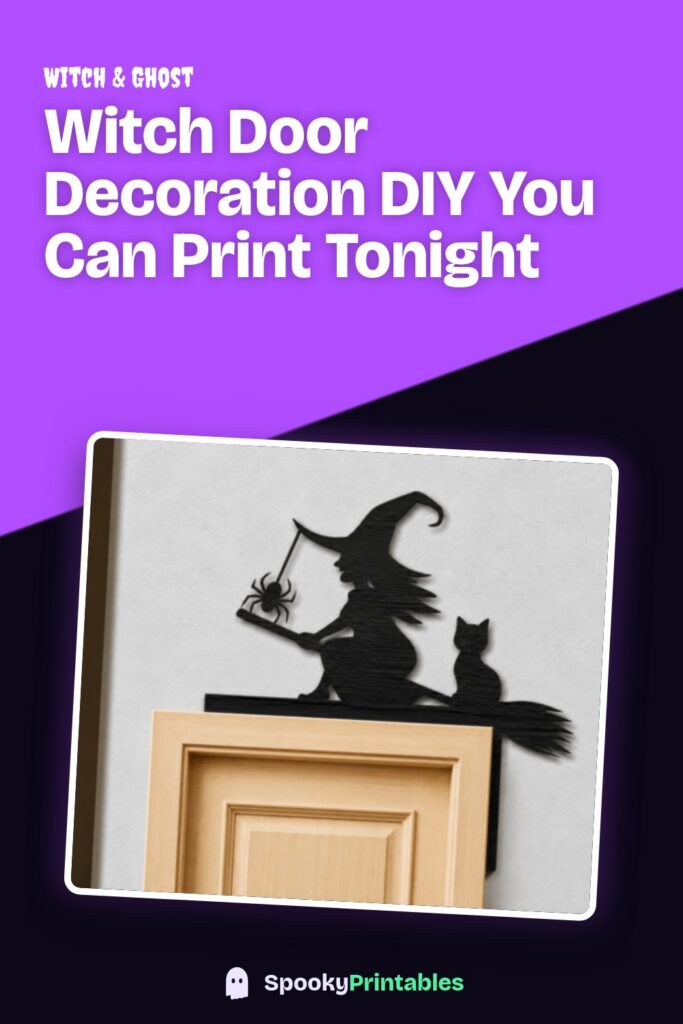
This post contains affiliate links. If you grab one of the printables I recommend, I may earn a small commission at no extra cost to you.
My front door is a witch now. Hat at the top, striped stockings poking out under the bottom rail, a broom leaning along the hinge side. The whole build took one evening, October 9th, start to finish, and honestly half of that was me on the hallway floor cutting stripes out of a kraft paper roll while the cat supervised from the stairs and waited for his moment.
Before anything went on the front door, it went on the pantry door. Same width, 36 inches, but indoors, so if the hat sat crooked nobody would see it but me. Practice door. I taped the full layout there, stepped back, moved the hat two inches left, and only then carried everything outside piece by piece. The stockings and the broom are freehand kraft paper, no template, but the hat, the corner pieces, and the signs all started as SVG files from an indie design shop, printed on 65 lb cardstock at the kitchen table.
Quick note before the step-by-step: some links below are affiliate links, so if you grab a file I might get a small cut at no cost to you. The cat gets nothing. He knows what he did.
Step One: Frame the Top of the Door with a Witch Corner
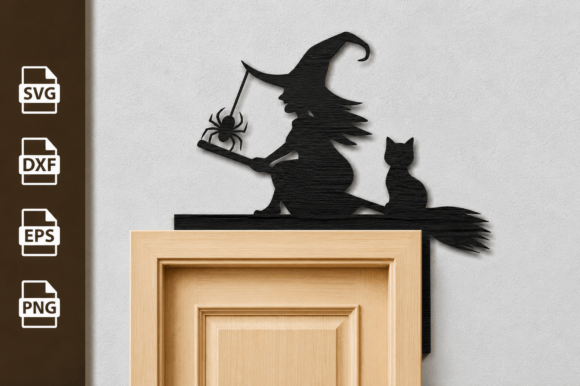
The build starts at the top left, because if the top is crooked the whole witch is crooked. This corner file is meant for laser cutters, but I do not own one, so I printed the outline across two tiled pages at 100%, taped the seam on the back, and cut it from black 65 lb cardstock with a craft knife. On the pantry door it looked small. On the front door, at actual viewing distance from the sidewalk, it was right.
My nitpick: the inner swirls are drawn laser-thin, and scissors will not survive them. Skip the tiny interior cuts entirely. From six feet away the silhouette does all the work anyway, and my hand still ached from the knife by piece three.
Attach with blue painter’s tape rolled into loops if your door is painted, or removable poster strips if it gets direct sun. Sun bakes tape into glue soup by week two. Learned that on last year’s outdoor banner.
The Salem Hat Sign That Sits at Eye Level
Every witch needs a face, and since a door does not have one, a sign at eye level does the job. This Salem hat sign went dead center, about 57 inches up, which is roughly where a peephole lives. I sized it to 10 inches wide straight from the SVG, one sheet, no tiling, which after the corner piece felt like a vacation.
I printed it in deep purple instead of black so it would read against my dark green door. Here is the thing about purple though. My printer thinks purple is a suggestion. First copy came out basically navy, and I had to bump the magenta in settings before it looked witchy instead of nautical.
One more thing: cut a slight arc into the bottom edge if your door has panel molding. Flat paper over a raised panel bubbles, and the bubble catches porch light at night like a blister.
A Little Tilted Hat to Hug the Right Corner
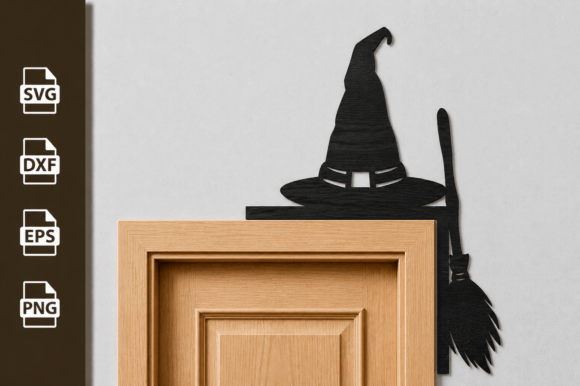
The top right corner gets its own hat, tilted, like the witch cocked it. This corner SVG is drawn to sit flush in a 90 degree angle, so there is no fiddly measuring, you just push it into the corner until it stops. I scaled mine to about 12 inches along the top edge, which on a 36 inch door leaves breathing room before the center sign.
My kid cut this one while I did the stockings, and it survived, which tells you the outline is forgiving. Wide curves, no traps. The one snag is that the file opens with the hat facing left, so for the right corner you have to mirror it before printing. I did not. I noticed at the taping stage. Reprint, two more sheets of cardstock gone, and we do not discuss it further.
The Matching Corner That Finishes the Frame
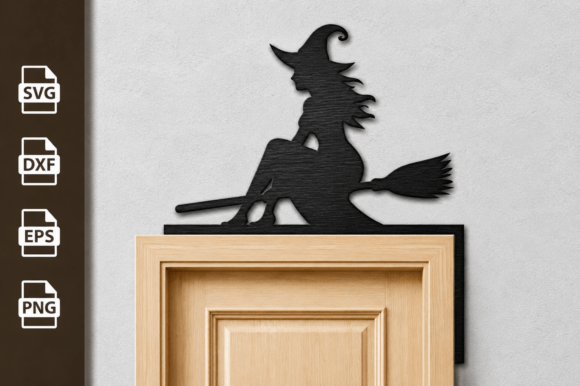
This is the sibling of the first corner file, and yes, you want both, because one dressed corner and one naked corner reads as unfinished, not artistic. I tried living with just one for a day. My neighbor asked if the wind took the other piece. Point made, second corner went up.
Same drill as before: tiled print, black cardstock, skip the interior detail cuts. Since I had the routine down, this one took maybe twenty minutes including the knife work, and that is the real argument for doing all four corner-and-hat pieces in one sitting. Your hands learn the curves.
Nitpick: the two corner files are drawn by the same shop but are not exact mirrors, the curl count differs by one. Nobody standing at your door will ever count curls. I counted. I need to be stopped.
Hang The Witch Is In Right Above the Handle
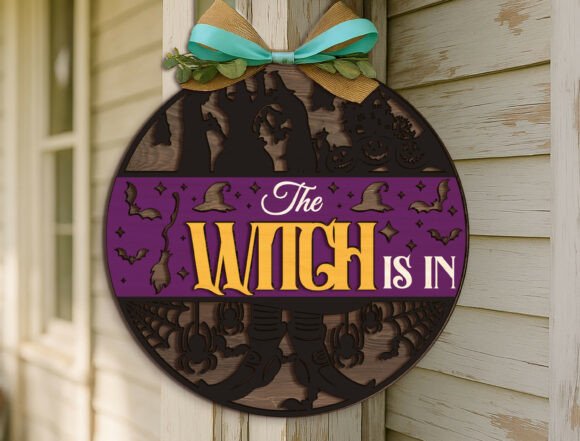
This sign is the punchline of the whole door. The Witch Is In, hung just above the handle, so trick-or-treaters read it right as they knock. I printed it 9 inches wide on white 110 lb cardstock, then edged it with a gray marker so it would look like carved wood instead of printer paper. Took four minutes. Biggest visual upgrade of the night.
Indoors, this same file earns its keep after October. I made a second copy for the pantry door, my former practice door, and it is still there in November because the pantry is where I go to be alone with the chocolate. The witch is, in fact, in.
Only gripe: the lettering has thin serifs that fuzz out if you print draft quality to save ink. Print it at normal quality. This is the one guests actually read up close.
Or Go Full Salem, If Your Door Talks in Words
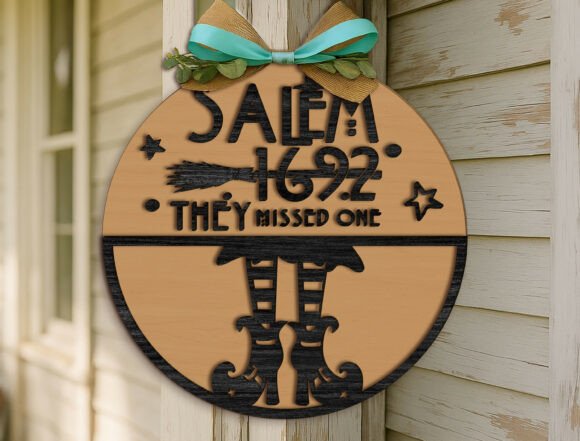
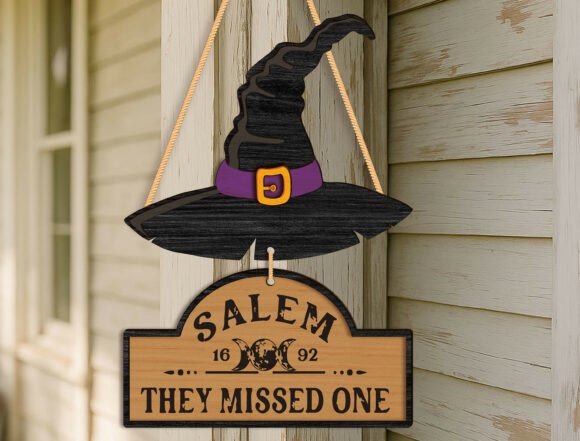
If The Witch Is In feels too cute for your street, this Salem sign is the moodier option, more apothecary, less party. I printed both and auditioned them on the pantry door side by side for a day. Salem won for the front. The other one kept its pantry job.
The file comes sized for laser cutting a wood blank, which means the proportions are long and narrow, about a 3 to 1 ratio. On a door that is a feature. I ran it 15 inches wide across two tiled pages, overlapped the seam behind the letter L, and you cannot find the joint unless I point at it.
One warning: the aged texture baked into the design eats black ink. My cartridge went from half to nearly empty on two copies. Worth it, but check your ink before you commit to reprints.
The Big Hat on Top, aka the Thing the Cat Keeps Winning
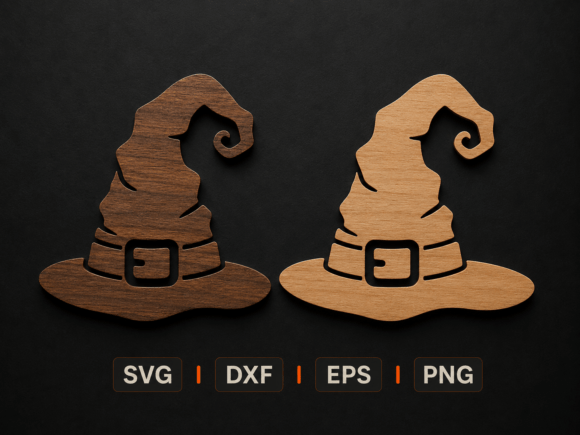
This is the head of the witch, the piece that sells the whole costume: one big hat sitting on the top edge of the door, brim slightly over the frame. I scaled the SVG to 20 inches wide, tiled it over four pages, backed it with a strip of cardboard from a shipping box so it would stand up stiff instead of flopping.
The cat took it down twice. Once while it was staged on the hallway floor, a clean pounce, and once off the pantry door when only tape loops held the bottom edge. After the second takedown I put poster strips on the cardboard backing plus a tape loop at the very tip of the hat, and it has held through two windy nights and one further attempt.
Nitpick that is really a tip: the file has a subtle buckle detail on the hat band that vanishes when you cut from plain black. I cut the band separately from orange cardstock and layered it. One extra sheet, and suddenly it reads as a hat, not a triangle.
Flying Witch Stakes to Walk People to the Door
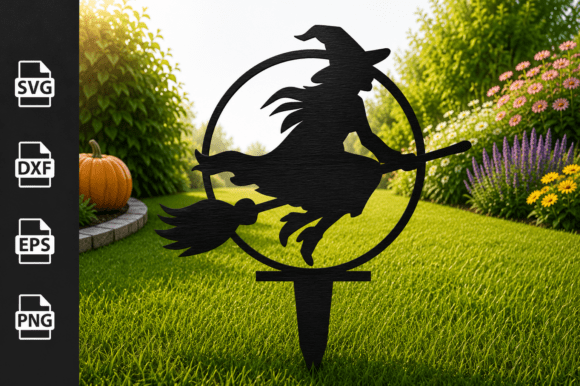
The door witch needs an entrance, so the yard gets flight traffic. These flying witch stakes are drawn for laser-cut wood, but the silhouettes print and cut fine from cardstock, and I zip-tied mine to bamboo skewers jammed into the flower bed, three of them, staggered heights, like a landing pattern aimed at the door.
They live next to my ghost decorations out there, the little white yard ghosts from September, and the mix works better than I expected. The witches read as chasing the ghosts across the lawn. A party guest last year asked if I planned the chase scene. Absolutely I did, is what I said.
Cardstock outdoors is a gamble, so laminate these if rain is possible. Mine went out unlaminated on October 20th, it drizzled on the 22nd, and one witch now has a droop that I choose to call a nosedive.
A Snarky Quote Beside the Doorbell for the Grown-Ups

The hat and stockings are for the kids. This one is for whoever rings the bell after 9pm. It is a snarky witch quote file, and I printed it small on purpose, 6 inches, mounted beside the doorbell where only someone actually at the door can read it. A little reward for showing up.
My sister read it, snorted, and asked for a copy for her apartment door, which is the highest honor a printable can earn in this family. Indoors it works fine at that same small size, hallway height, next to a light switch.
Heads up on the file itself: it comes with several quote variants layered in one SVG, and if you print without hiding the extra layers you get overlapping text soup. Open it, pick one layer, hide the rest, then print. Two minutes that save a sheet.
An Enchanted Lantern Silhouette for the Hinge Side
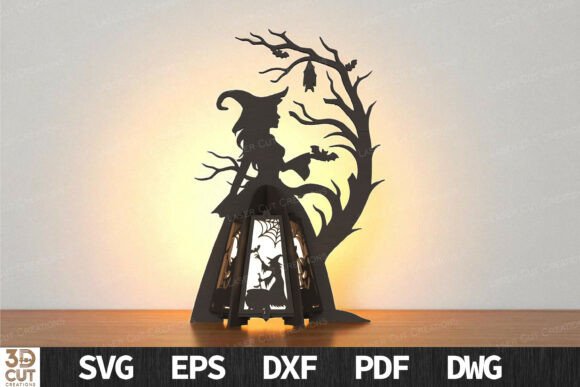
Last piece. The broom leans on the hinge side, and above the broom goes this lantern silhouette, like the witch hung it there before going in. It is a laser-cut lantern design, ornate, and I printed it at 11 inches tall on black cardstock, then backed the openwork with a scrap of yellow tissue paper so the cutout areas glow warm against the door in daylight.
The tissue trick is the whole move here. Without it the lantern is a black blob. With it, people assume there is a light source and lean in to check. There is not. It is tissue paper from a birthday gift bag I flattened and kept, because of course I kept it.
The honest nitpick: the ornate frame means real knife work, twenty minutes of it, and my corner shortcuts do not apply because here the interior IS the design. Save this one for when your hands are fresh, not at 11pm after nine other pieces.
Frequently Asked Questions
Why is my printer printing ghost images?
Fitting question for this project, and it is usually one of two things. On a laser printer, a faint repeat of the image lower on the page means the drum is not fully wiping between rotations, so it stamps a pale echo. A new toner cartridge or drum unit typically fixes it. On an inkjet, a smeared double usually means wet ink hit the rollers, so let dense black pieces like the hat sit in the output tray a minute before you stack the next sheet on top.
If the ghost image is from a completely different document, that is leftover data in the print queue. Clear the queue, power the printer off and on, and it stops haunting you. Mine once reprinted a school permission slip over a witch corner. The blend was not spooky, just confusing.
Does ghost affect ghost?
If you mean does printer ghosting ruin ghost printables, yes, and it is sneaky, because a pale echo hiding inside a white ghost shape is nearly invisible until the porch light rakes across it at night. Check dense-ink pieces at an angle under a lamp before you tape anything up.
If you mean layering ghost decor over ghost decor, also yes, in a good way. My yard ghosts sit under the flying witch stakes, and white shapes in front of white shapes just merge into mush, so I offset mine and put the darker witches behind. Contrast does the work, not quantity.
What is ghost printing?
It is the printer defect from the first question: a faint duplicate of your image showing up where it should not, usually from a worn drum, wrong paper weight setting, or fuser temperature mismatch. Heavy cardstock triggers it more than copy paper, because the printer is fusing toner at a setting meant for thinner sheets. Switching the paper type setting to cardstock or heavy fixed it on mine.
Confusingly, some craft shops also use the phrase for an intentional effect, printing a design in very pale ink as a subtle background. So if a file listing says ghost print, read closer. One is a flaw, the other is the whole point.
Does every ghost house have a secret exit?
In the movies, always, usually behind a bookcase. In my house the closest thing is the pantry door, which spent a week as the practice door for this project and now permanently wears The Witch Is In sign. Guests keep opening it expecting a hallway. They find cereal.
For decorating purposes the real takeaway is that interior doors are free real estate. A back door, a closet, a pantry, any of them can carry the leftover pieces from a project like this, and a witch hat corner on an unexpected door gets a better reaction than a whole decorated porch sometimes. The surprise is the exit, or the entrance, depending which side of the cereal you stand on.
Before You Print
Total damage: one evening, about 14 sheets of cardstock, half a black cartridge thanks to the Salem sign, and two hat recoveries from cat custody. Order of operations that worked: corners first, center sign, big hat, then the freehand kraft paper stockings and broom last, because by then you can see exactly how much door is left to fill. Stockings want to be about 26 inches long to peek convincingly from under the bottom rail.
When November hits, do not fold anything. The stockings roll back onto the empty kraft paper tube they came from, the flat pieces slide into a garment box under the guest bed with wax paper between the layers, and the big hat keeps its cardboard backing so it stays stiff for next year. Label the tube. Last January I found an unlabeled tube, opened it expecting wrapping paper, and a striped stocking leg unrolled across the floor. The cat left the room.