This post contains affiliate links. If you grab one of the printables I recommend, I may earn a small commission at no extra cost to you.
My sister called it the wall of doom. She meant it nicely. Every September I clear the big blank stretch over the couch and start taping things up, and by the second week of the month she walks in, sighs, and asks if the bats are load-bearing yet.
Most of what goes up there started as a cut file from an indie design shop. I print on the heavy 110 lb cardstock, run a few through the laser if my neighbor lets me borrow her machine, and the rest get taped flat with whatever painters tape is in the drawer. Some years it looks like a real haunted parlor. The year I ran out of black ink it looked like a gray smudge convention. We grew from that.
Below are the ten files I keep coming back to for walls specifically, with the spot each one ended up and the one thing I’d warn you about. A couple of these links are affiliate links, so if you grab a file I might get a tiny cut. Costs you nothing. Tape included, sadly, not.
The Bundle That Filled My Whole Stairwell
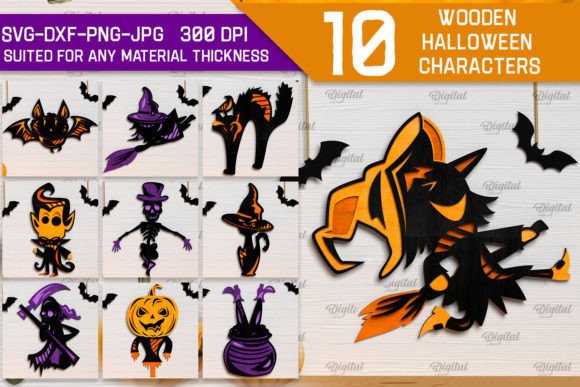
This one is a fat pack of cut shapes, and I mean fat. I opened the folder expecting four or five and got something like a dozen, so I gave up on the couch wall and did the entire stairwell going up to the bedrooms instead. Bats climbing the angle of the rail. Looked deliberate. It was not.
I laser-cut these on thin black acrylic my neighbor had lying around, which gave them a glossy edge that catches the hallway light at night. If you don’t have a cutter, print on the 110 lb and back them with chipboard so they don’t flop forward.
Nitpick: a few of the smaller shapes have skinny little connector bits that snapped on me during weeding. Save the bundle file, recut the broken one, don’t try to glue a 2mm bat leg back on at 11pm.
My Kitchen Window Got The SVG Treatment
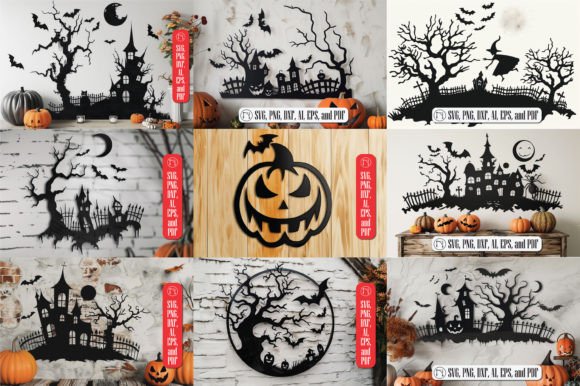
I put this set in the kitchen window, of all places. The shapes are clean enough that backlit by the afternoon sun they read as proper silhouettes, not a printed blob. My partner did a double take washing dishes, which is the whole point of decorating a window nobody looks at.
The SVG cut clean on the first pass, no fiddling with the speed settings, which almost never happens. I taped them straight onto the glass with a loop of tape behind each one. Came off in November without pulling paint, a small miracle.
One gripe: the file is sized big. I scaled it to about 60 percent to fit a standard window pane, and a couple of the thinner cuts got fragile at that size. Bump your kerf or just cut the bigger pieces.
A Single Cut File That Anchored The Hallway
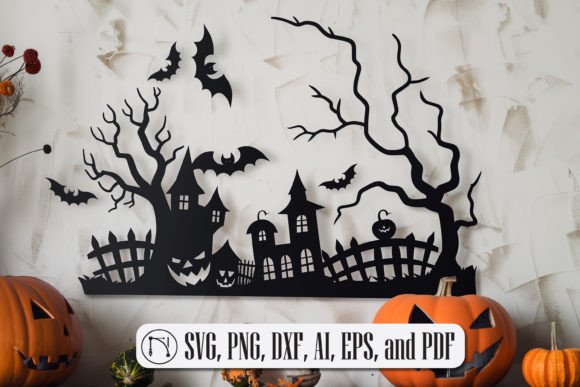
Not a bundle, just one strong design, and honestly that was a relief after the folder of forty shapes. I cut it once, big, in a deep plum cardstock I had left over from a wedding project, and hung it dead center on the narrow hallway wall where you can’t fit anything wide.
Plum instead of black was a gamble. It reads almost burgundy in lamp light and I like it more than I expected. If you laser this, the single-piece design means no tiny parts to lose, which my October self thanks my July self for.
The catch: it’s one big shape, so any cut imperfection shows. My laser stuttered on one long curve and left a faint scorch line. I turned that side to the wall. Nobody is checking the back of your hallway art.
Little Wood Signs I Pretended To Make From Scratch
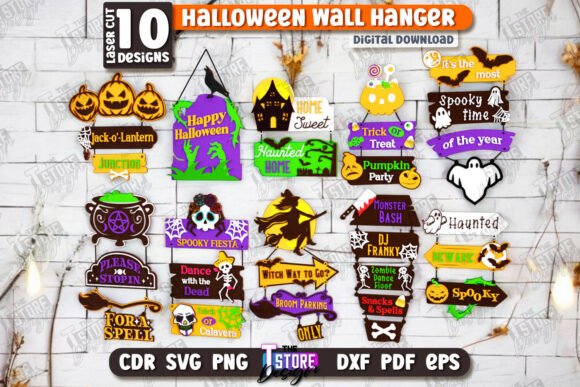
This is the sign pack, the kind with words cut out, and I leaned every single one along the floating shelf in the living room like I’d whittled them myself over a long autumn weekend. I did not. I cut them on 3mm plywood in about forty minutes and let people assume.
A light sand on the cut edges and a wipe of dark stain made the plywood look like something off a farmhouse porch. Lean them, don’t hang them, then you don’t have to find studs.
Honest warning: the lettering has fine interior cuts, the inside of an O, that sort of thing, and on cheap plywood with voids those little centers can blow out. Use a decent birch ply or accept a gappy R.
The 3D Layered One That Ate My Whole Saturday

I will be straight with you, this CNC bundle is the ambitious one. The pieces stack into layered 3D scenes, and the payoff is real, but it ate a full Saturday and a chunk of the next. My kid helped glue layers and we both had spray adhesive on our hands for two days.
Once it’s built and standing on the entry console it throws actual shadows on the wall behind it, which is the kind of thing that gets a gasp at a party. Worth the Saturday. Barely.
The nitpick is the assembly order. The files don’t number the layers, so I dry-fit the whole stack twice before gluing anything. Photograph your dry-fit. You will forget which fence panel goes where.
One Delicate Bat For The Powder Room
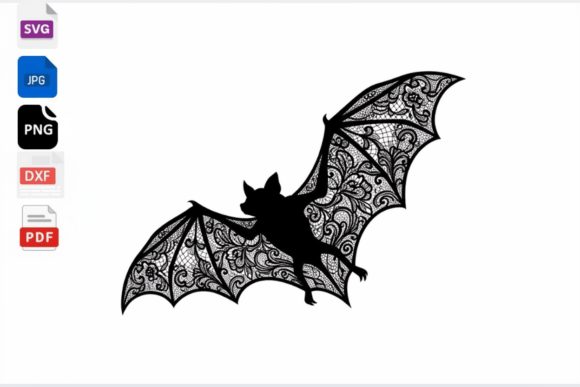
The lace bat is the dainty one in this whole list, all fine filigree wings, and it would be wasted on a big wall. I cut a single one and hung it over the little mirror in the powder room where guests actually stand still long enough to notice the detail.
I cut it from cream cardstock instead of black so the lacework reads against the dark wall paint. A neighbor at the movie night asked where I bought it. From an indie design shop, I said, and she did not believe me.
Be warned, the lace detail is genuinely fine. My first paper attempt tore lifting it off the mat. Go slow on the weeding, or cut it from thin felt-backed stuff if your hands aren’t patient that night.
The Wall Art Pack I Spread Across Three Rooms

Another bundle, and a generous one, so I stopped trying to keep it in one place. A couple of pieces went over the bookshelf, two by the front door, one stray bat ended up in the bathroom because I had it left in my hand. Spreading a set thin actually looks more lived-in than a tidy cluster.
These cut fine on cardstock for the indoor spots. For the front door pieces I switched to that weatherproof sticker stock so the porch damp wouldn’t curl them by the second week.
My one complaint: the bundle mixes wildly different sizes with no preview sheet, so I printed a contact sheet first to see what I was dealing with. Do that. Saves you scaling each file blind.
The Statement Piece Above The Mantel

This single wall-art file became the centerpiece over the mantel, the spot that catches everyone’s eye the second they walk in. I cut it large, almost two feet across, in matte black, and gave it a good two inches of breathing room on every side so it reads as one bold shape.
Big and simple was the right call here. A party guest stood in front of it for a full minute before asking if it was an expensive store piece. It was a file and a sheet of cardstock and forty cents of tape.
The downside of going big: any waviness in the paper shows on a flat wall. I mounted mine on a thin foam board first so it sits perfectly flat. Floppy cardstock above a fireplace looks sad. Back it.
Its Quieter Twin Over The Reading Chair
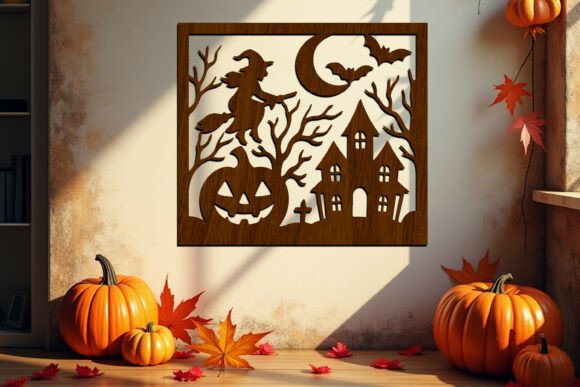
This is the calmer sibling of the last one, less busy, and I put it over the reading chair in the corner where I didn’t want anything loud competing with the lamp. Some walls want a whisper, not a shout.
I cut it in a deep charcoal rather than true black so it doesn’t vanish against the dark corner. Hung it a little low, at sitting eye level, since that corner is where I actually sit with a book and a candle in October.
Small thing to watch: this design has one long thin element that wants to bow. I ran a strip of clear tape along the back of it like a spine. Holds it straight, invisible from the front, ugly from behind.
The Spooky Tree That Took Over The Nook

I saved the tree for last because it’s my favorite and the kids’ favorite. Bare branches, the kind that look like fingers, and I cut it tall to fill the skinny wall in the breakfast nook where nothing else fit. The little ones hang paper ghosts off the branches all month.
I cut this from 3mm black acrylic so it would survive being yanked on by small hands reaching for the ghosts. Cardstock would have lasted a week in that nook. It did not survive last year. We learned.
The one issue is the branch tips, very thin, easy to snap on the weed. I cut a spare tree the same night for parts. By mid-October two tips had broken off and I swapped them in without anyone noticing.
Frequently Asked Questions
Can anyone stay at soho farmhouse?
Not exactly. Soho Farmhouse is a members club, so staying overnight generally means being a member or coming as a member’s guest. It isn’t an open-to-all hotel you just book on a whim.
I bring it up because a lot of the farmhouse-style wall decor floating around is inspired by that look. You don’t need the membership to get the vibe. A cut-out wood sign and some bare-branch art on a plain wall gets you most of the way there at home.
Can anyone go to soho farmhouse?
Day access works much the same way as staying. It’s built around membership, so casual drop-ins aren’t really the model, though guests of members can come along.
For the decor side of the question, that cozy rural-club feeling is all about natural materials and restraint. I lean into plywood signs, charcoal tones instead of harsh black, and a lot of empty wall left alone. The bats are the loud part. Everything around them stays calm.
Should you decorate above kitchen cabinets?
I think it depends on the gap. If you have that deep dead space above the cabinets, a few cut-out shapes or a small leaning sign up there fills it nicely and draws the eye up. Empty cabinet-top space can look unfinished otherwise.
My rule is keep it light and a little sparse so it doesn’t read as clutter you can never reach to dust. Two or three pieces, propped, not a crowded shelf. I did exactly this last fall with a couple of the smaller laser bats and it pulled the whole kitchen together.
Do you decorate above kitchen cabinets?
I do, but only in October and only barely. The rest of the year it stays bare because I cannot reach up there without dragging a chair over and I am not dusting decor I have to climb for.
For Halloween I prop two or three lightweight cut pieces up there, things I can knock into place with a broom handle from the floor. Easy up, easy down. If a piece needs a ladder to hang, it goes somewhere I can actually reach.
Before You Print
If you only grab one off this list, make it the tree for a kids’ nook or the big single piece for over the couch. Those two did the most work for the least fuss, and the tree survived a full month of small hands yanking ghosts off it once I switched to acrylic.
Print one tonight. Tape it up crooked, step back, fix it tomorrow. Last year I left the stairwell bats slightly off-level until December and honestly nobody but my sister ever said a word.